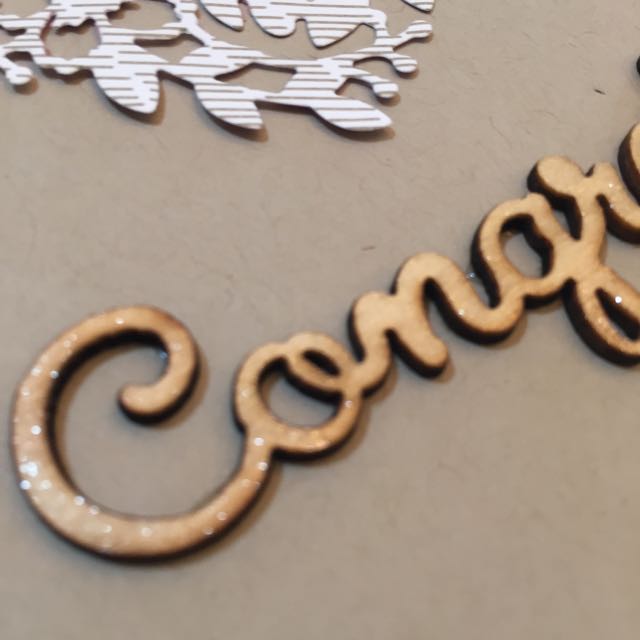
I mounted the make'n'take piece onto some Basic Black and then Sahara Sand card stock. I also added some Very Vanilla twine.
Wednesday, December 30, 2015
Going Global Card
This card was fun to create. I love the technique of inking the inside of your embossing folder before you run it through the Big Shot - have you tried that before? Stampin' Up! inks are water-based so you just rise them right off under running water :-)
Tuesday, December 29, 2015
Bloomin' Hearts Thinlits card
This card is sooooo simple! All I did was stick some pearls onto the thinlit heart that we had already cut out at the On Stage event, then mount that onto a Crumb Cake card base. Then I added a sentiment from the Expressions Natural Elements - easy peasy again! I also dabbed on the new Wink of Stella Glitter Brush in clear. It adds a gorgeous subtle shimmer.
Botanical Blooms Card
OMG peeps, I actually finished the 4 cards, watermarked and saved the photos and now I'm blogging them! It's a Christmas miracle! ;-)
The first one is the Botanical Blooms card. I simply added a stamped sentiment in Cajun Craze ink and then mounted onto Cajun Craze and Old Olive card stock - easy peasy! I'll do a fancy list of supplies below:
"On Stage" event make and takes
Hi blog readers - if there's even anyone out there! (I know, I don't blog often enough, sorry!)
Today I am finally getting around to doing something with the cute little make'n'take projects we made at the Stampin' Up! On Stage event back in November. I intend to turn these cute little pieces into actual cards - I'll be back this afternoon with the results!
Thursday, April 23, 2015
Hawaii Grand Vacation Blog Hop
Welcome to our Grand Vacation Hawaii Achievers Blog Hop! You may have landed here from Renee Kohnke.
This is my first ever Blog Hop so I'd love you to leave me a comment to let me know if you are visiting me for the first time :-)
I actually struggled a bit to come up with something "Hawaii themed".... All I could think of was a fantastically perfect stamp set we had in our catalogue about 5 years ago called "Tropical Party" - it would have been ideal! But we don't have that anymore so I had to think of something else...
A punch art hula dancer was one thought I had but punch art is not really my forte and I didn't want to just copy someone else's clever idea.
Finally it dawned on me - carve my own stamps!! Yes! I love the Undefined Carving Kit. Its just the perfect thing when you can't find a stamp to suit what you want.
I carved this hibiscus stamp because the hibiscus flower is one of the first thing that pops to my mind when I think of a tropical location like Hawaii.
Earning the Stampin' Up! Hawaii Grand Vacation was a big task for me and I couldn't have done it without the help and support of so many of my customers, friends, team members and family. I realised I'm going to need some thank you cards to thank some of those key people for their help. So here's what I came up with using my new hibiscus stamp:
I used the same stamp for the background as well as the focal point image. I've sponged the coordinating inks around the edges of the card stock to create some depth and definition.
I hope you liked my card and stamp :-) Enjoy the rest of the blog hop!
Blog Hop List
1. Brian King
2. Louise Sharp
6. BJ Peters
10. Simone Bartrum
11. Dawn Griffith
12. Marelle Taylor
13. Dena Rekow
14. Connie Stewart
15. Alisa Tilsner
16. Tami White
17. Renee Kohnke
18. Bec Ross
19. Ann Craig
20. Vanessa Webb
21. Sandi MacIver
22. Sharon Armstrong
23. Barb Mullikin
24. Connie Babbert
25. Alison Solven
26. Betty Button
27. Lisa Curcio
28. Krista Frattin
29. Kim Gavarra
30. Jacque Williams
Labels:
Blog Hop,
Hawaii,
Stampin' Up!
Location:
Brisbane QLD 4000, Australia
Sunday, April 19, 2015
Mother's Day Flower Pot Card
Here's my Mother's Day design for this year - a flower pot card! These cute flower pots were all the rage a few years ago but I never actually made one. This year I finally got around to figuring it out. They are actually super easy to make. I did a web search for "flower pot card tutorials" and after looking at a few, I changed the measurements a bit to suit me and also to have it fit inside the Australian sized C6 envelopes we carry.
I've used the 2013-2015 In Colours which are about to retire. Baked Brown Sugar is the flower pot base and the other four colours are in the flowers and leaves. I also created a matching Petite Purse using the big shot die.
The measurements of the flowerpot base is 9 1/2" x 4". Turn to landscape position and
score at 1 1/2", then again at 5 1/2".
Fold the smaller flap forward and the bigger part in the opposite direction to create the flowerpot. Use the paper trimmer to cut off about 1 cm on the diagonal to create the shape.
The insert is 3" x 4 3/4"and the flowers are attached with dimensionals at the top so they sit nicely on the outside of the flowerpot rather than disappearing into it.
Sunday, April 5, 2015
Easter Printers Tray
Happy Easter!
We used colours from the Subtles range and the stamp sets For Peeps Sake and Happy Easter Bunny.
Labels:
easter,
For Peeps Sake,
Happy Easter Bunny,
Printers Tray,
Stampin Up
Subscribe to:
Posts (Atom)